There’s nothing like finally getting out of a nail salon with freshly painted nails. A beautiful set of nails is an amazing way to add a little bit of ‘glam’ to your outfit. A fresh manicure feels amazing, right? We’re sure you agree. But nail salons can be expensive, especially when you decide to get nail art. This is why we have carefully made a list of chic nail art ideas that you can try at home.
You might be thinking…but I’m not a nail artist by any means. Relax. We know that and with these designs, you don’t even need to be one. Whether you are a colorful French tips girl or you love polka dots, we have made sure that you find something that you love in this list.
The only things you need are your favorite nail colors and some nail tools.
Remember to Apply a Basecoat for all of these designs. 😉
Must-Try Chic Nail Art 2021 With Tools at Home
Polka Dots Design
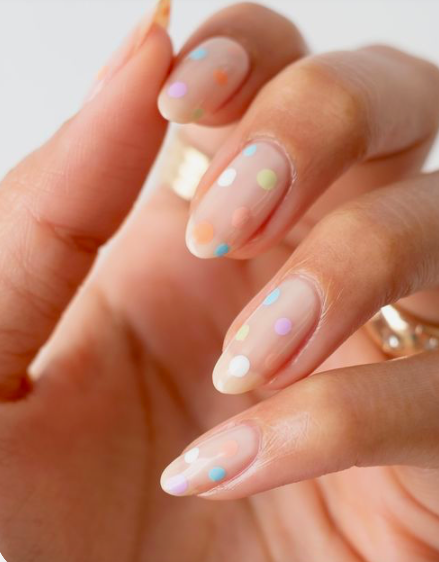
Tools You Need: A Toothpick
- Start with a layer of your favorite nail polish.
- Now, dip the back end of a toothpick in a contrasting color polish.
- Place the end on your nail to create Polka Dots. Finish up with some topcoat and you are done!
Zesty Orange Design
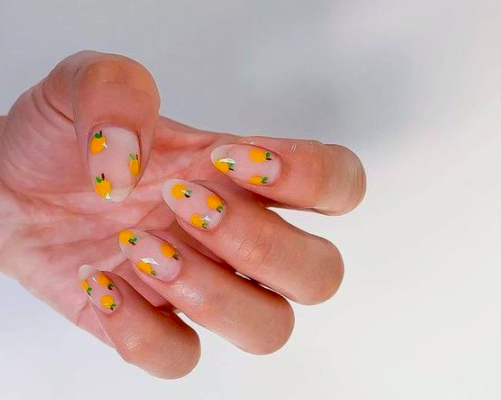
Tools You Need: A Toothpick, Round Head Pin
- Start by dipping the top of a round headpin in bright orange or yellow polish.
- Place the top onto your nails to end up with a circle.
- Now with a toothpick dipped in green polish create small strokes to resemble stalks.
- Finish with a top coat. Just a perfect summer-appropriate design.
Cake Sprinkles Design
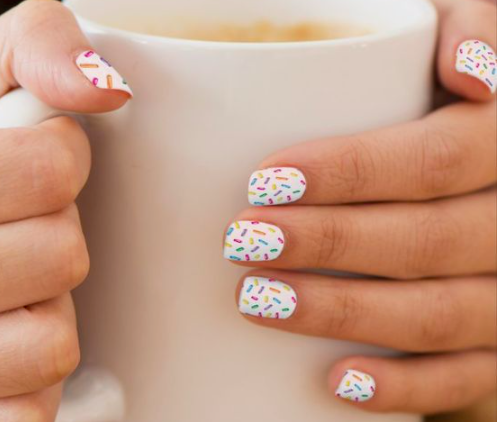
Tools You Need: Q-tips
- Start by creating a striper brush by pulling the loose top of a Q-tip and twisting it. You can also trim if you see any unwanted ends.
- Dip, the twisted end of the Q-tip into your favorite bright polish and create small lines onto your nail resembling cake sprinkles.
- Repeat with other Q-tip brushes with different bright colors of your choice and voila, a beautiful cake sprinkle look.
Clear Glitter Tops
Tools You Need: A Small Brush, Colored Glitter of Your Choice
- Before the base coat dries up, dip the small brush into your favorite glitter. You can take as much or as little glitter depending upon the look you want.
- Now, lightly tap the brush from the side so that the glitter sprinkles on the top of your nails.
- For an ombre look, add more glitter toward the end of your nails.
- Tap the sides of your fingers lightly to remove the excess glitter.
- End up with a top coat for a finished look.
Colorful French Tips
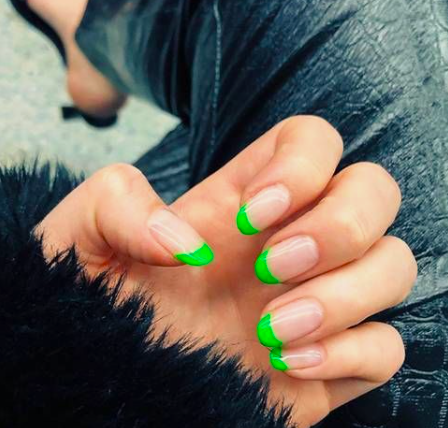
Tools You Need: Painter’s Tape
- Start by applying two coats of nude polish or a coat of base coat on your nails. Make sure that your second coat is fully dry.
- Now, take the painter’s tape and carefully apply it below the tips of your nails. (you can skip this step and paint freehand as well.)
- Take a few bright nail polishes (yes, different colors look good) or a nail color of your choice, and start painting your tips.
- After, applying two color coats, seal off with a top coat!
Cute Smiley Faces
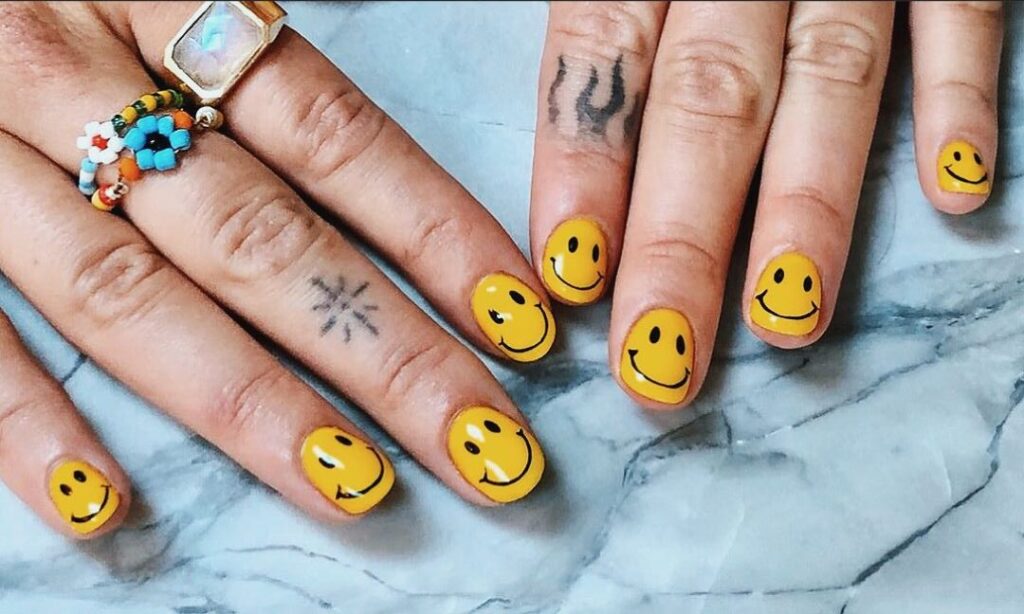
- Painting cute smiley faces on your nails can be the best source of Happiness at your fingertips!
- Start by applying base coat nail polish.
- Now, just take a toothpick, dip it in black polish, and make two dots to resemble eyes. Now with a thin nail polish or a thin stick brush make a smiley face.
- You need to make sure that you are as precise as you can.
- Seal off with a top coat for extra shine!
Pastel Stripes on Nude Nails
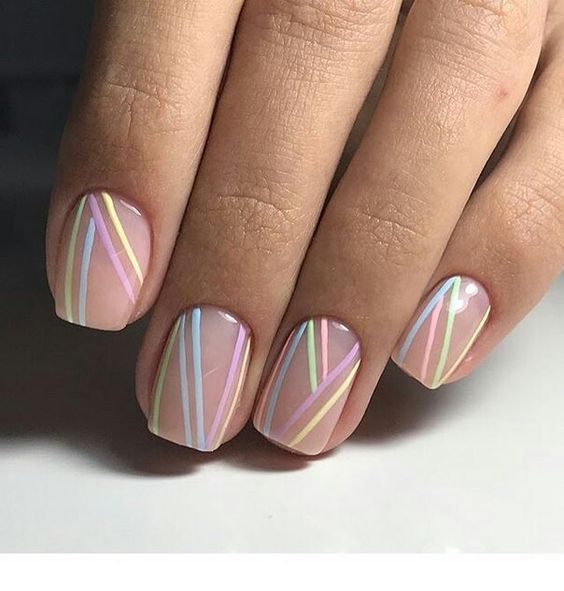
- Pastel stripes can give off professionally done nail vibes. Pastel stripes are not only fun but they look equally stylish and are easy to create.
- Start by applying a base coat on your nail.
- Now, take the color of your choice, dip a thin brush in the polish, and create stripes of your choice.
- Make sure to create clean stripes and not overdo anything.
- Apply a top coat for protection and add shine to the nails!
Bright Swirls on Nails
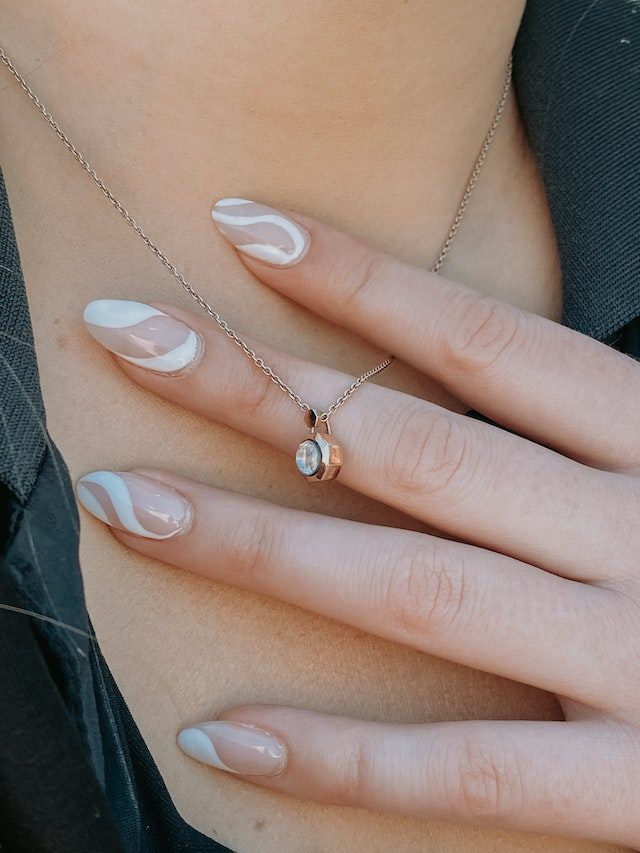
- Bright swirls give a funky look. They are not much to do but they look very elegant and playful.
- Start by applying a base coat or nude nail coat on your nail.
- Now, with your favorite bright color polish, you can create swirls with a thin brush or a toothpick.
- Try to create precise swirls. For more fun, you can create glitter swirls along with the bright nail color.
- When you are happy with the design, seal it off with a top coat for added shine!
Chic Nail Art Ideas With Just Nail Polish Brush
Metallic Glitter Nails
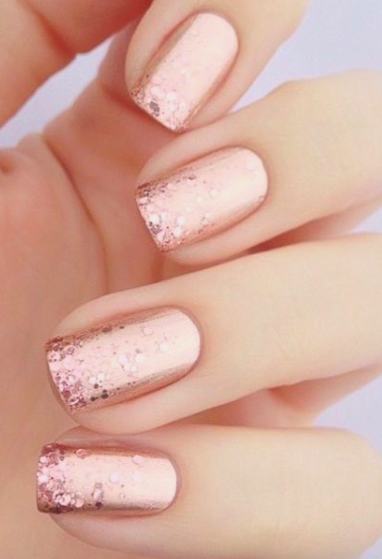
If you have a metallic and glitter polish (of the same base tone), you are in for a treat.
- Start by applying two layers of your favorite metallic polish.
- Now, just take your glitter polish. Remove the excess from the nail polish brush and start applying from the mid-length of your nail to the top. Make sure to leave out the base of your nails.
- You can add another layer of glitter polish if you feel there isn’t enough ‘bling’.
- Seal off with a top coat for extra shine!
Neutral Designs – 1
Paint all of your nails with two coats of any neutral polish of your choice.
Apply a clear glitter coat on any finger (or two!) of your choice.
End up with a topcoat!
Neutral Designs – 2
Paint all of your nails with two coats of your favorite neutral nail polish.
Now, with the brush of black (any dark) nail polish, paint half of your nail vertically.
Seal off with a top coat.
Arrow French Tips
Start with base coat painted nails or neutral painted nails.
Take a colored nail polish of your choice and start by painting from the side of your nail toward the center of the tip of the nail.
Repeat the process on the other side of the top of the nail as well towards the center of the nail tip. Finish off with a top coat!
Here we are at the end of this list. Whatever design you choose to do, just remember to have fun! After all, a manicure is one of the best ways to make yourself feel special. Feel free to share with us in the comments if you have tried any of these or any other designs that can be done at home!
Stay tuned to the blog for more exciting content on Beauty and Fashion.
Love !!